This post contains affiliate links, which means I may receive a commission from qualifying purchases made through these links. As an Amazon Associate, I earn from qualifying purchases and will only recommend products I have personally used! Learn more on my Affiliate Disclosure Page and Privacy Policy Page.
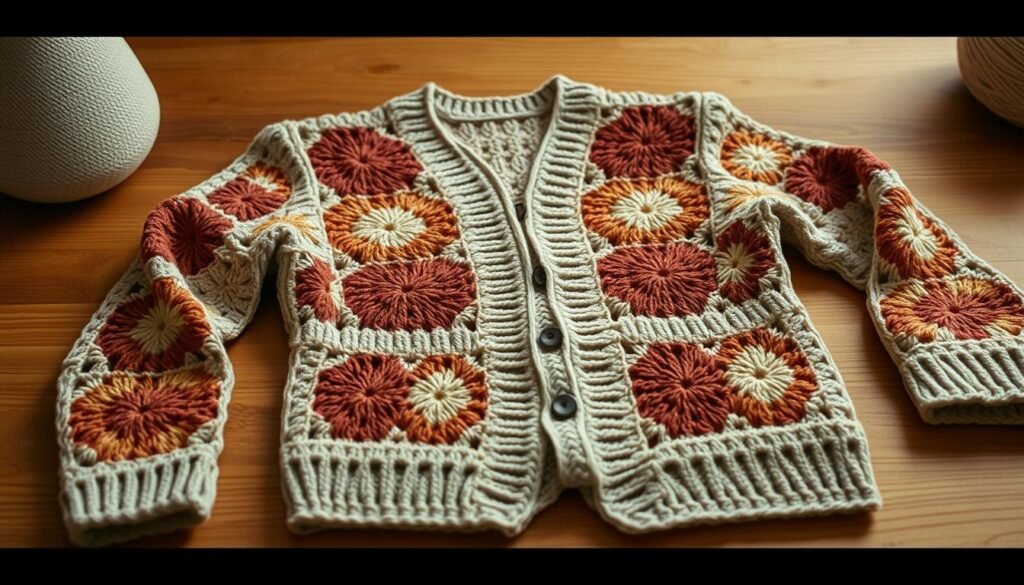
Do you remember that feeling of pride when you finished a handmade project? It’s magical to turn simple yarn into something you can wear. I felt that rush when I made my first granny square cardigan last winter. It became my favorite piece of clothing.
These cardigans are all the rage, mixing old charm with new fashion. They’re versatile, letting you pick colors, sizes, and styles that fit your taste.
Working with granny square patterns is easy. You’ll learn the basic square fast, then join them to make a beautiful cardigan. This guide will help you make a cozy fall layer or a light summer cover-up.
I’ll cover picking the right materials, putting your squares together, and adding finishing touches. By the end, you’ll have a cardigan that shows off your style and skills.
Key Takeaways
- Granny square cardigans combine vintage charm with modern style
- This project is suitable for crocheters of all skill levels
- You can customize colors, size, and style to match your preferences
- The modular nature of granny squares makes this an approachable project
- You’ll learn techniques for professional-looking finishing touches
- The pattern works for both warm winter layers and light summer cover-ups

Getting Started: Materials and Tools You’ll Need
Starting a granny square cardigan project needs the right materials and tools. Having everything ready will make crocheting smoother and more fun. This is especially true for beginner crochet projects, where interruptions can stop your learning.
Creating a granny square cardigan doesn’t need fancy tools. But, using quality materials makes a big difference. Let’s look at what you need to start this colorful journey.
Yarn Selection: Types and Quantities
Choosing the right yarn is key for your cardigan’s look, feel, and durability. Medium weight (4) yarn is best for granny squares. It makes sturdy squares that are comfortable to wear.
For a colorful cardigan, use 6 different colors. Consider Ecru, Honey, Adobe, Olive, Pomegranate, and Mahogany. The yarn needed depends on the size:
- XS/S sizes: 1 skein (100g) of each color, plus 2 skeins of your ribbing color
- M/L & XL/2XL sizes: 2 skeins of each color, plus 3 skeins for ribbing
- 3XL/4XL sizes: 3 skeins of each color, plus 4 skeins for ribbing
Think about the fiber content of your yarn. Wool is warm but might be scratchy. Acrylic is durable and easy to care for. Cotton is great for warmer weather. Blends often offer the best of both worlds.
Essential Crochet Hooks and Sizes
The right hook size is important for consistent stitches. For medium weight yarn, a 5.00mm hook is perfect. It makes granny squares with the right density.
Your crocheting style affects your tension. If you crochet tightly, try a 5.5mm hook. If your stitches are loose, use a 4.5mm hook. Many crochet tutorials suggest making a test square to check your gauge.
Ergonomic hooks with cushioned handles reduce hand fatigue. This is especially helpful when making many granny squares.
Additional Notions and Accessories
Several accessories make creating your cardigan easier:
- Sharp scissors dedicated to yarn cutting
- Darning or tapestry needles with large eyes for weaving in ends
- Stitch markers to keep track of your rounds
- Measuring tape for checking square sizes and garment dimensions
- Buttons for closure (choose these early to ensure your button loops are the right size)
A project bag keeps everything organized, especially with multiple colors. Use small bags or containers to separate your squares by color or completion status.
Optional but helpful tools include blocking mats and pins for shaping your squares. A notebook to track your progress and any pattern changes is also useful. Having these accessories ready before you start will help you stay focused on your cardigan project.
Essential Crochet Tools for Beginners
Article: 25 Easy Crochet Patterns Every Beginner Should Try, as my top 10 Amazon Affiliate Products for beginner-friendly tools that make learning easier.
Understanding the Basics of Granny Squares
Learning to make granny squares opens up a world of design for your crochet cardigan. These motifs are loved for their simplicity and flexibility. Whether you’re new or experienced, knowing how to make these squares is key to a beautiful, personal garment.
Granny squares grow in rounds from the center out, making a pattern of clusters and spaces. Their modularity means you can make them one at a time. This makes your cardigan project easy to carry and manage.
The standard granny square has four corners, but you can make them differently. You can add more corners, change the stitch pattern, or play with colors. This lets you make your cardigan your own.
Benefits of using granny squares for garments include:– Portability – work on one square at a time
– Versatility – endless design possibilities
– Accessibility – perfect for beginners and advanced crocheters alike
– Stash-busting – ideal for using up leftover yarn
Before starting your cardigan, practice making granny squares until they’re even. Even size and tension make your finished garment look great.
The Classic Granny Square Pattern
The traditional granny square has a simple pattern we all know. You start with a magic ring, which makes the center of your square tight and hole-free.

For Round 1, chain 3 (counts as your first double crochet), work 2 double crochet into the magic ring, chain 3, work 3 double crochet into the ring, chain 3, work 3 double crochet, chain 3, work 3 double crochet, and chain 3. Slip stitch into the first stitch of the round and turn your work.
Round 2 builds on this. Chain 3, work 2 double crochet into the chain space, chain 3, work 3 more double crochet in the same space, chain 1. Repeat this pattern in each chain space around: 3 double crochet, chain 3, 3 double crochet, chain 1. Finish by slip stitching into the first stitch and turning your work.
You can keep adding rounds to make your square bigger. For a granny square cardigan pattern that’s already been tested and perfected, you might want to check out established designs before creating your own.
Color Combinations and Design Ideas
The colors you choose will greatly affect your granny square cardigan’s look. You can go for a cohesive look or something vibrant and eclectic.
Think about color theory when picking your colors. Complementary colors make bold contrasts. Analogous colors create a harmonious look. Monochromatic schemes use different shades of the same color for elegance.
You can use colors in many ways. Try solid squares in a pattern, squares with different colors for each round, or squares with the same color pattern but in different colors.
| Color Approach | Visual Effect | Difficulty Level | Best For |
|---|---|---|---|
| Solid squares in pattern | Clean, graphic look | Beginner | Modern, minimalist style |
| Color change each round | Traditional, playful | Intermediate | Bohemian, vintage style |
| Monochromatic scheme | Subtle, sophisticated | Beginner | Elegant, versatile garments |
| Planned color pooling | Complex, artistic | Advanced | Statement pieces |
Make a few test squares in different colors before starting your project. This lets you see how colors work together. Remember, lighting can change how colors look, so check them in the lighting where you’ll wear your cardigan.
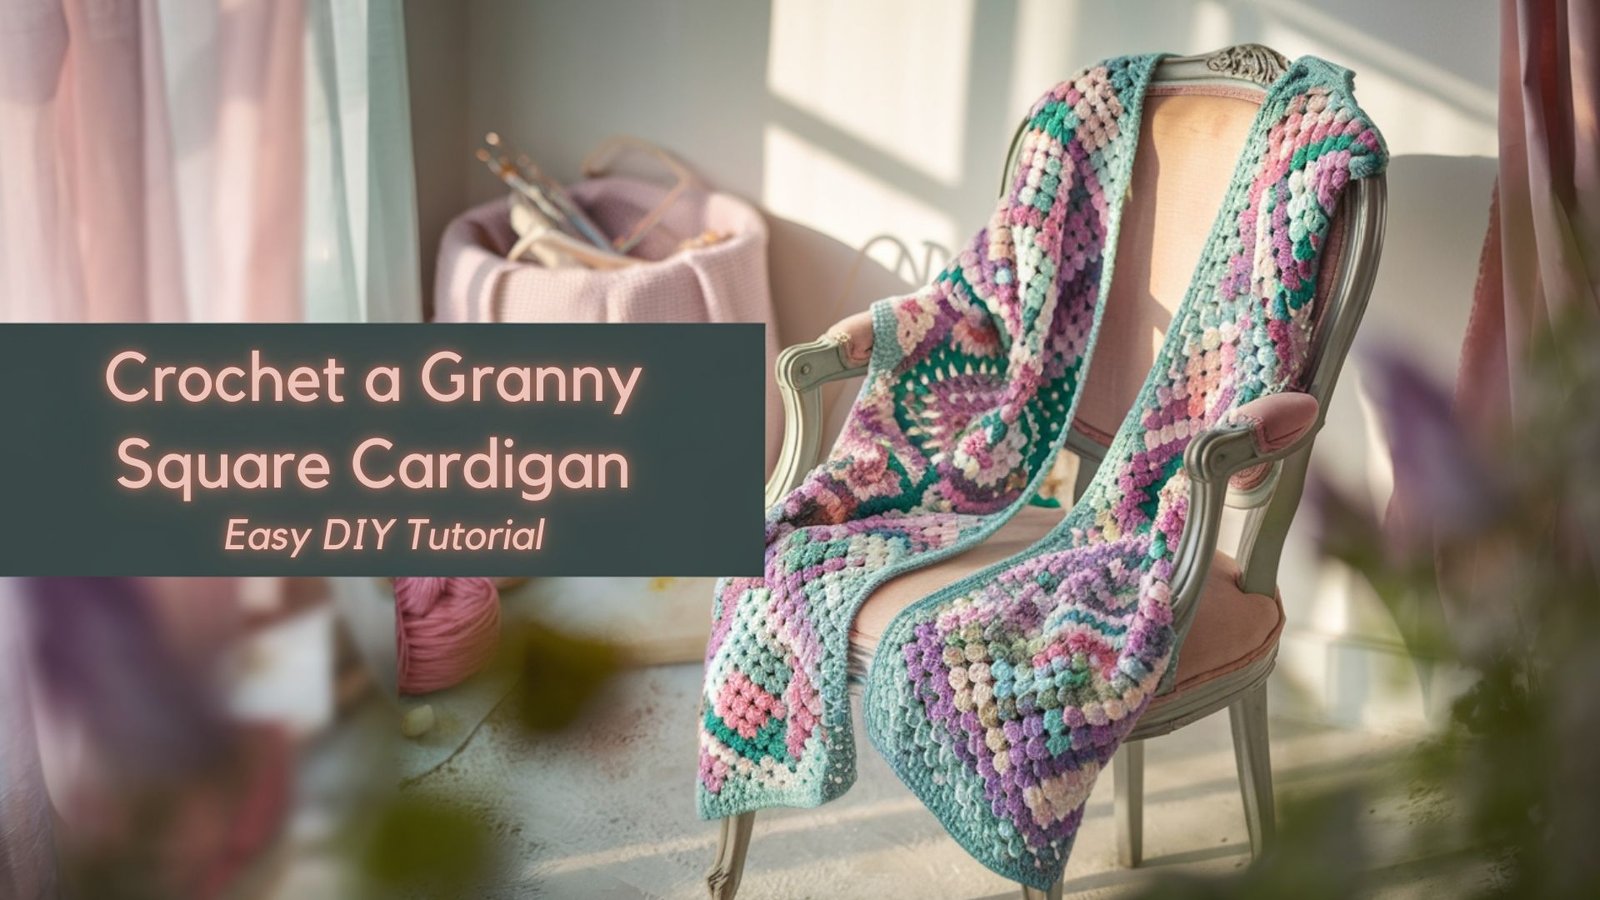
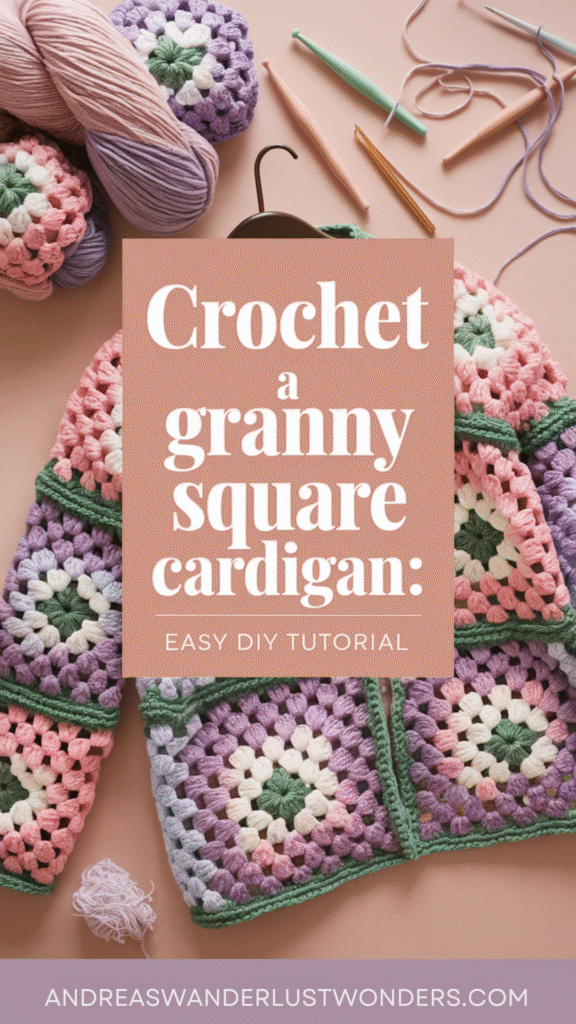
How to Crochet a Granny Square Cardigan
Starting your granny square cardigan is exciting. It’s a chance to make something special, just like you want it. You’ll learn the basics and make squares that will turn into a cozy cardigan.
Starting with the Magic Circle
The magic circle is a great way to start your granny squares. It makes a tight center without holes. This makes your squares look neat and professional.
To make a magic circle, wrap yarn around your fingers once. Make a loop. Put your hook in the loop, yarn over, and pull through. Chain 3, then start crocheting into the circle.
The magic circle can be closed tightly after the first round. This makes your granny square strong and won’t come undone easily. It’s important for a cardigan that gets worn and washed a lot.
Creating the First Round
The first round sets up your granny square. Start with a magic circle and chain 3. Then, make 2 more double crochets to form a cluster.
Chain 3 for the first corner, then make another cluster of 3 double crochets. Keep doing this until you have four clusters with chain-3 spaces in between. These spaces will be your corners.
To finish the round, slip stitch into the top of your initial chain-3. Pull the yarn tail to close the magic circle. Pay close attention to your tension here. It’s key for your whole square.
Building Additional Rounds
As you add rounds, your granny square will grow. For round 2, chain 3, then 2 double crochets in the same space. Chain 1, then make a cluster of 3 double crochets in the corner chain-3 space.
In round 3, the pattern gets bigger. Chain 3, then 2 double crochets in the chain-1 space, chain 1. Make 3 double crochets in the corner chain-3 space, chain 3, and 3 more in the same corner. Chain 1 and keep going around the square.
When making squares for your cardigan, size matters. For XS/S, stop at 4 rounds. For M/L, go to 5 rounds. For XL/2XL, do 6 rounds. For 3XL/4XL, do 7 rounds. Keeping your tension even ensures your squares are the same size.
Finishing and Weaving in Ends
Finishing your granny square cardigan right is important. When you’re done, cut the yarn, leaving a 6-inch tail. Pull the tail through the last loop and tighten it.
Weaving in ends keeps your squares from coming apart. Use a tapestry needle to weave the yarn tail through the back of your stitches. Change direction at least once to secure it. This keeps your ends in place, even after washing and wearing.
If you’re joining your squares with the tails, leave them longer, about 12 inches. Stack your squares neatly to keep them in shape. Blocking them before joining helps them fit perfectly.
Every square you make brings you closer to your granny square cardigan. Taking the time to finish each square makes your finished project last longer and look better.
Planning Your Cardigan Design
Before starting your granny square cardigan, planning is key. A good plan saves yarn, time, and avoids frustration. Modern crochet fashion mixes structure and creativity, making granny square cardigans versatile.
Planning lets you tailor your cardigan to fit your body and style. Whether using cardigan patternsor designing your own, measuring and calculating are crucial. Visualize your project before starting.
Taking Measurements for a Perfect Fit
Getting accurate measurements is the first step for a cardigan that fits well. Use a flexible measuring tape to record these important measurements:
- Bust/chest circumference at the fullest point
- Shoulder width from edge to edge
- Arm length from shoulder to wrist
- Desired cardigan length from shoulder to hem
Granny square cardigans are usually loose but should still flatter your body. Add 2-4 inches to your bust measurement for comfort.
For sleeve width, measure your upper arm’s widest point and add 1-2 inches. These measurements will guide your project and ensure a perfect fit.
Calculating the Number of Squares Needed
With your measurements in hand, figure out how many granny squares you need. This depends on your square size, which varies by yarn weight, hook size, and your crochet tension.
The size of your squares should match your body size. Here’s a sizing guide:
| Size Range | Front/Back Panel Squares | Sleeve Squares |
|---|---|---|
| XS/S | 5 inches × 5 inches | 7 inches × 7 inches |
| M/L | 6 inches × 6 inches | 8 inches × 8 inches |
| XL/2XL | 7 inches × 7 inches | 9 inches × 9 inches |
| 3XL/4XL | 8 inches × 8 inches | 10 inches × 10 inches |
To find out how many squares you need for width, divide your bust measurement (with ease) by your square’s width. For example, if your bust measurement with ease is 40 inches and your squares are 5 inches wide, you’ll need 8 squares across (40 ÷ 5 = 8).
For length, divide your desired cardigan length by your square’s height. If you want a 25-inch long cardigan with 5-inch squares, you’ll need 5 squares vertically (25 ÷ 5 = 5).
Remember to calculate squares for the front panels, back panel, and sleeves separately. Add a few extra squares as backups in case some turn out differently or get damaged.
Creating a Layout Diagram
A layout diagram is your guide for assembling your cardigan. Draw a simple sketch showing the arrangement of squares for each section: back panel, front panels, and sleeves.
Graph paper is great for this, with each square representing one granny square. Label the dimensions clearly and show how many squares you’ll need in each row and column.
If you’re using multiple colors, mark your color placement on the diagram with colored pencils. This step is key for balanced color patterns and avoiding color shortages.
Think about whether you want a cropped, standard, or longer cardigan. Adjust your layout accordingly. Your diagram should also show any special squares, like those for the neckline or armholes.
This visual guide will be invaluable when joining your squares. It ensures your cardigan pattern turns out as you imagined.
Making Enough Granny Squares for Your Cardigan
Making the granny squares for your cardigan takes patience. But, with the right techniques, it’s both fun and efficient. For a standard cardigan, you’ll need about 27 Panel Squares and 8 Sleeve Squares. Breaking it down into steps makes it easier, especially for beginners.

Batch Production Techniques
Working on several squares at once speeds up your work. This method helps you get into a rhythm and saves mental effort. It’s a great way to avoid getting stuck on one square.
Try these batch production methods:
- Finish round 1 on all squares before starting round 2
- Use pre-cut yarn lengths for several squares at once
- Set aside specific times for different square stages
- Keep squares connected until the final round
Many crocheters find working in batches of 5-10 squares manageable. Setting daily goals, like making 3-5 squares, can make the project feel less overwhelming. Staying consistent in your workflow helps keep your squares consistent too.
Keeping Squares Consistent in Size
It’s important to keep your squares the same size for a professional look. Even small differences can be noticeable when joining squares. To keep your squares uniform:
Always use the same hook size. Your tension might change as you get more comfortable with the technique, especially if you’re new to crochet patterns.
Count your stitches at the end of each round carefully. Mistakes in stitch count can cause size issues. If your squares are different sizes, blocking can help. Dampen your squares, pin them to the right size on a foam mat or towel, and let them dry completely.
Organizing Your Squares by Color and Pattern
As you make more squares, staying organized is key. A good system from the start saves time and prevents confusion when assembling.
| Organization Method | Best For | Tools Needed | Advantages |
|---|---|---|---|
| Design Board Layout | Complex color patterns | Foam board, pins | Visual confirmation of design |
| Labeled Storage Bags | Long-term projects | Ziplock bags, labels | Protects from dust and pets |
| Digital Tracking | Large cardigans | Spreadsheet, phone app | Easy to update progress |
| Numbered Grid System | Asymmetrical designs | Paper grid, pencil | Prevents assembly mistakes |
Take progress photos as you organize your squares. It documents your journey and helps you see how colors and patterns will look together. Many crocheters find laying out completed squares on a bed or floor helps keep them motivated by showing their progress.
Assembling Your Granny Square Cardigan
Putting your granny squares together is where your cardigan comes to life. It’s a time of patience and detail, but the end result is worth it. With your squares laid out, you’re ready to start making your cardigan.
Joining Methods: Whip Stitch, Slip Stitch, and More
Choosing the right way to join your squares is key. It affects how your cardigan looks and lasts. Each method has its own look and keeps your squares together.
The whip stitch makes a nearly invisible seam on the right side. It’s easy for beginners and makes a flat, strong connection.
The slip stitch join adds a decorative ridge. It’s quick to make and keeps your cardigan stable.
| Joining Method | Appearance | Difficulty Level | Best Used For |
|---|---|---|---|
| Whip Stitch | Nearly invisible on right side | Beginner | Clean, flat seams |
| Slip Stitch | Decorative ridge | Beginner | Textured designs |
| Mattress Stitch | Invisible on both sides | Intermediate | Professional finish |
| Single Crochet Join | Pronounced ridge | Beginner | Contrasting color details |
The mattress stitch makes a seam that’s invisible on both sides. It needs more care but looks professional. TL Yarn Crafts has a video that shows all four methods.

Creating the Front Panels
Start by making the front panels. Arrange your squares as planned, making sure the pattern flows well.
Join the squares vertically first, then horizontally. This makes complete panels. The front panels are narrower for a good fit when closed.
Make sure the front panels are the same on both sides. This symmetry makes your cardigan look professional.
Forming the Back Panel
The back panel is the biggest part of your cardigan. Join the squares the same way as the front panels.
Make sure the back panel’s top edge fits with the front panels’ shoulders. This ensures a good fit and drape.
Place special squares or color work on the back panel for interest. Many tutorials suggest putting intricate squares here.
Attaching Sleeves
To make sleeves, join squares into rectangular panels. The number of squares depends on the sleeve length and arm size.
Once the sleeve panels are done, fold them in half and seam the edges. This makes tubes that fit under the arm.
Attach the sleeves to the body at the shoulder. Make sure there’s room for movement but still looks good. Pin the pieces together to avoid fit issues.
Adding Finishing Touches
Once you’ve put together your granny square cardigan, it’s time for the final touches. These details make your cardigan look great and last longer. A well-finished granny square cardigan is something you’ll be proud to wear or give away.
Creating Borders and Edgings
Borders and edgings make your crochet sweaters look complete and structured. A simple single crochet border around all edges gives a clean look. For something more special, try scalloped edges or shell patterns.
For sleeve cuffs, start by joining yarn at the sleeve opening with a slip stitch. Chain 1, then single crochet around the opening. In Round 2, single crochet in the back loops only. This adds a nice texture and makes the cuffs stretchy. Contrasting color borders really make your cardigan pop, showing off your hard work.
Adding Closures: Buttons, Ties, or Zippers
The right closure keeps your cardigan in place and adds to its charm. Pick a closure that fits your style and the cardigan’s use.

| Closure Type | Difficulty Level | Best For | Installation Tips |
|---|---|---|---|
| Buttons | Easy | Classic look | Space evenly, use yarn to create loops |
| Ties | Very Easy | Casual style | Braid matching yarn, attach at center front |
| Zipper | Advanced | Secure closure | Sew to blocked edges with matching thread |
| Toggles | Moderate | Statement pieces | Secure with reinforced stitching |
When picking buttons, match them to your yarn colors and size. Braided yarn ties are great for a relaxed look and add style.
Blocking Your Finished Cardigan
Blocking turns your homemade cardigan into a pro-looking sweater. It makes your stitches even, edges straight, and shape perfect.
For yarns like wool or alpaca, wet blocking is best. Soak your cardigan in lukewarm water with mild wool wash for 15-20 minutes. Then, squeeze out water without wringing. Lay it flat on a blocking mat, shape it, and pin edges to keep it in place as it dries.
For acrylic yarns, steam blocking works better. Lay your cardigan flat and steam it without touching the iron to the yarn. This relaxes the fibers into their final shape. Always block your cardigan before adding buttons or zippers to ensure proper fit. Once dry, your granny square cardigan will look amazing, showing off your crochet skills.
Troubleshooting Common Issues
Making a granny square cardigan can have its ups and downs. But knowing how to fix common problems can make all the difference. Even pros face issues sometimes. With the right knowledge, you can get past these hurdles and finish your cardigan with pride.
Crochet is as much about solving problems as it is about being creative. Many issues have easy fixes that won’t make you start over. Let’s look at some common problems and how to solve them.
Fixing Uneven Squares
Uneven squares can be really frustrating. If your squares are different sizes, your cardigan won’t fit right. Blocking is your best friend for this problem:
- Wet or steam your squares and pin them to the right size
- Let them dry completely while pinned
- For small squares, add extra stitches when joining
- For big squares, decrease stitches when joining
If your hexagons look lumpy at first, don’t worry. It’s normal and means they’ll fit together well later.
Addressing Sizing Problems
Sizing issues often show up after joining several squares. If your cardigan isn’t the size you expected, there are ways to fix it:
If it’s too big, you can:
- Remove some squares from your layout
- Make it fit better with strategic decreases in the border
- Add waist shaping with well-placed decreases
If it’s too small, try:
- Add extra squares to make it longer or wider
- Make the border wider to increase size
- Use a bigger hook for the border to add room
This cardigan style is meant to be boxy and slightly big. If you want a tighter fit, plan to make it smaller from the start.
Dealing with Yarn Shortages and Color Matching
Running out of yarn mid-project can be a big problem, especially with specific colors. Here’s how to deal with yarn shortages:
- Always buy extra yarn at the start of your project
- Check dye lots to ensure color consistency
- If you can’t find an exact match, use a similar shade in less noticeable areas
- Consider using a new color as a design element
For hand-dyed yarns, matching colors is key. Buy enough yarn from the same dye lot for your whole project. If you must mix dye lots, alternate them every few rows to blend the transition.
With these tips, you’ll be ready for any challenges in making your granny square cardigan. Remember, solving problems is part of the creative journey. It will make you a better crocheter over time.
Conclusion
You’ve now made your own granny square cardigan! This journey has taught you many skills. You’ve learned to make individual squares, plan a garment, join pieces, and add finishing touches.
Your handmade cardigan is both useful and a display of your crochet talent. Granny squares are great because they can be made in many ways. You can change the style, color, and fit to suit your taste.
Now, try new things with your next project. You can play with different square patterns or colors. Many crocheters say each new cardigan helps them get better at their craft.
Remember, the more you crochet, the better you’ll get. Each project teaches you something new and makes you more confident. Your granny square cardigan is special because it shows your personal style and hard work.
I hope this guide has encouraged you to make more crochet clothes. Share your cardigan online. Your unique take might inspire others to make their own granny square creations!
With what you’ve learned, you’re ready for more challenging cardigan patterns or even to design your own. Your crochet adventure is just starting!
FAQ
What type of yarn is best for a granny square cardigan?
How many granny squares will I need for a cardigan?
What’s the best way to join granny squares together?
How do I keep all my granny squares the same size?
What kind of border should I add to my granny square cardigan?
How do I fix uneven squares in my cardigan?
Can beginners make a granny square cardigan?
How long does it take to make a granny square cardigan?
What hook size should I use for my granny square cardigan?
How do I create a cardigan that fits well?